Introduction
String art, or the string representation of portraits, is a fascinating technique that allows us to create intricate images using a network of nails and string. This method transforms traditional portraiture into a unique blend of art and mathematics. Crafting these artworks manually would be an overwhelming task due to the complexity involved in determining the optimal arrangement of strings. Fortunately, with the aid of computers, we can calculate the best-fit lines among countless possible configurations, making this computationally intensive process manageable and bringing these stunning creations to life.
Live Preview: https://byteblueprints.github.io/string-art-nextjs/
Python implementation: https://github.com/byteblueprints/string-art-python
Next JS implementation: https://github.com/byteblueprints/string-art-nextjs
Motivation
I recently watched an amazing YouTube video that introduced me to the world of string art. The video which can be viewed here, explained the process in a clear and engaging way, which sparked my curiosity to learn more about this unique art form. As I explored further, I came across many interesting articles and research papers on the topic.
One of the most insightful papers I found is titled “String Art: Towards Computational Fabrication of String Images” which you can access here. It provides a detailed look at how computational methods can be used to create intricate string art designs. Inspired by this, I decided to try implementing it myself to experience the magic of string art firsthand.
Creating String Art Using Python
We aim to generate a stunning string art representation of a portrait on a circular canvas. The canvas will have nails evenly placed along its circumference, serving as anchor points for the strings. We’ll use a greedy algorithm to determine the best lines for replicating the image with strings.
Key Parameters
- Circle Radius: 250 pixels
- Number of Nails: 250
- Maximum Lines: 4000
Steps to Implement
1. Convert the Image to Grayscale
- Prepare the input image by converting it into grayscale. This simplifies the data, focusing on brightness levels.
2. Set up the Canvas and Place Nails
- Create a circular canvas with the same dimensions as the grayscale image.
- Evenly position a predefined number of nails along the circumference.
3. Precompute All Possible Line Combinations
- Calculate all possible lines connecting the nails.
- Store these combinations efficiently for quick access.
4. Use the Greedy Algorithm to Draw the String Art
- Predict the best lines to replicate the image based on pixel intensity.
- Draw lines iteratively, adjusting the canvas to reflect the accumulated string effect.
- Stop when the desired level of detail is achieved.
1. Convert the Image to Grayscale
This Python code snippet uses OpenCV to preprocess an image by converting it to grayscale and resizing it to 500×500 pixels
import cv2


def get_image_in_grayscale(path: str):
    grayscale_img = cv2.imread(path, cv2.IMREAD_GRAYSCALE)
    img_resized = cv2.resize(grayscale_img, (500, 500))
    return img_resized
2. Set up the Canvas and Place Nails
First, we need to calculate the nail coordinates, which are the x and y positions where the nails will be placed on the canvas.
import math


def get_nails_coordinates(input_num_of_nails, center_x, radius):
    """
       Calculate the nails coordinates using the trigonometry

       Args:
           input_num_of_nails :  Number of nails needed.
           center_x :  Center offset x.
           radius :  Radius of the circle.

       Returns:
           circle_coordinates: the result image.
           ex: [(x,y), (x1,y1), (x2,y2)]
       """
    nails_coordinates = []
    for i in range(input_num_of_nails):
        theta = 2 * math.pi * i / input_num_of_nails
        x = center_x + (math.floor(radius * math.cos(theta)))
        y = center_x + (math.floor(radius * math.sin(theta)))
        nails_coordinates.append((x, y))
    return nails_coordinates
3. Precompute All Possible Line Combinations
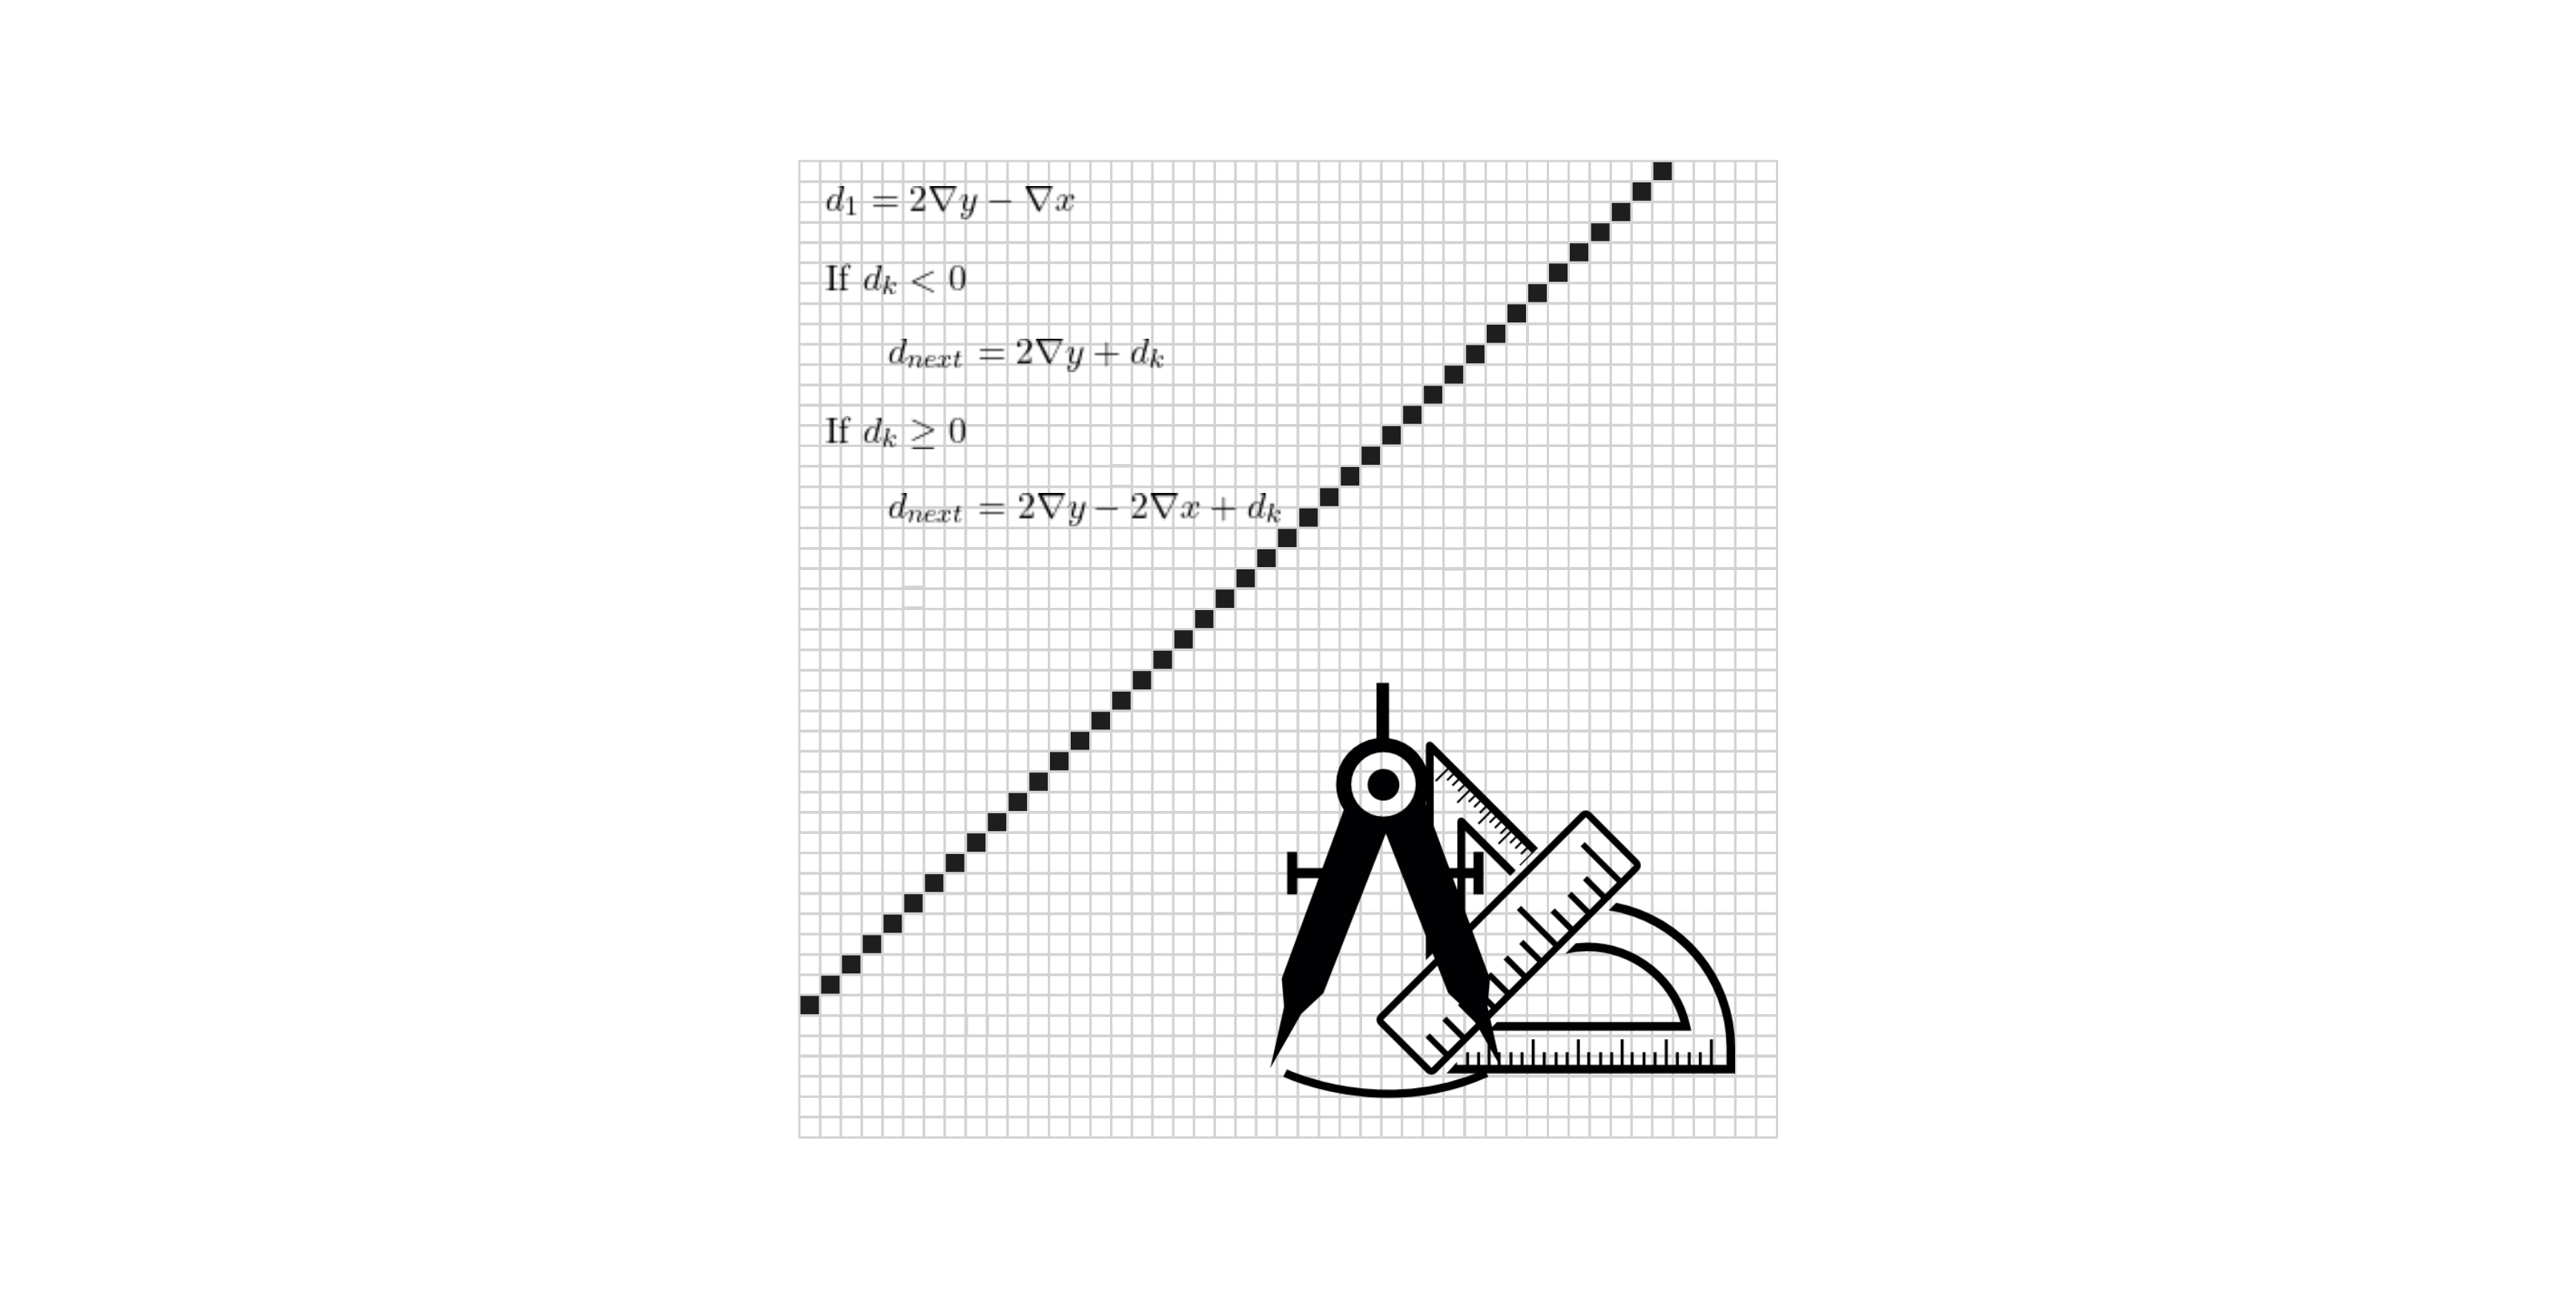
Next, we need to calculate all possible line combinations based on the nail coordinates. Each line is drawn using Bresenham’s line algorithm. The lines will be stored along with their corresponding nail pairs, creating a structure similar to the example shown in the GIF.(Figure 1)

Figure 1
When storing the lines, we save them for both directions of the nail combination. For example, a line from nail 1 to nail 10 is stored with keys 1_10 and 10_1. This approach introduces some redundancy, but storage and efficiency are not a concern here. Similarly, the calculations are performed with O(n²) time complexity, as optimization is not a priority in this scenario.
When calculating all possible lines, we use a variable called skip to specify how many nails to skip from the starting nail. This is because lines connecting nearby nails are visually insignificant and not worth considering. For this purpose, we set the skip value to 20.
import numpy as np

def get_all_possible_line_combinations(nail_coordinates):
    """
    Generates all possible line combinations between nails, considering each pair of nails
    and skipping nearby ones based on a defined `skip` value. The lines are stored in both
    directions (i.e., for each pair of nails, lines are stored for both start-to-end and
    end-to-start connections).

    Args:
        nail_coordinates (list of tuple): A list of (x, y) coordinates representing
                                          the positions of the nails.

    Returns:
        dict: A dictionary where the keys are string representations of the nail pair
              combinations (e.g., "0_5" and "5_0"), and the values are the corresponding
              line coordinates between the nails.
    """
    processed_combinations = []
    line_combinations = {}
    line_count = 0
    skip = 20
    total_nails = len(nail_coordinates)

    for start_index in range(total_nails):
        for end_index in range(start_index + skip, total_nails):
            # Generate unique connection identifiers
            connection_key = f"{start_index}_{end_index}"
            reverse_connection_key = f"{end_index}_{start_index}"

            # Skip if the connection has already been processed or if it's the same nail
            if connection_key in processed_combinations or start_index == end_index:
                continue

            # Get the line coordinates between two nails
            line_vector = get_line_coordinates_as_vector(
                nail_coordinates[start_index][0], nail_coordinates[start_index][1],
                nail_coordinates[end_index][0], nail_coordinates[end_index][1]
            )

            # Mark both directions of the line as processed and store the line
            processed_combinations.append(connection_key)
            processed_combinations.append(reverse_connection_key)
            line_combinations[connection_key] = line_vector
            line_combinations[reverse_connection_key] = line_vector

            line_count += 1
            print(f'\rGenerating Line: {line_count}', end='', flush=True)

    return line_combinations

def get_bresenham_line_coordinates(x0, y0, x1, y1):
    """
    Calculates the coordinates of all points on a line between two points
    using Bresenham's line algorithm.

    Args:
        x0 (int): The x-coordinate of the starting point.
        y0 (int): The y-coordinate of the starting point.
        x1 (int): The x-coordinate of the ending point.
        y1 (int): The y-coordinate of the ending point.

    Returns:
        list of tuple: A list of (x, y) coordinates that form the line between
        the two points.
    """
    dx = abs(x1 - x0)
    dy = abs(y1 - y0)
    sx = 1 if x0 < x1 else -1
    sy = 1 if y0 < y1 else -1
    err = dx - dy
    line_coordinates = []
    while True:
        line_coordinates.append((x0, y0))

        if x0 == x1 and y0 == y1:
            break

        e2 = err * 2
        if e2 > -dy:
            err -= dy
            x0 += sx
        if e2 < dx:
            err += dx
            y0 += sy
    return line_coordinates
4. Use the Greedy Algorithm to Draw the String Art
To implement the greedy algorithm for drawing the string art, we introduce a few additional variables:
- Maximum Number of Lines:
Defines the total number of lines to draw. This acts as the stopping condition for the algorithm. The value is set to4000lines, ensuring sufficient detail in the final output. - Skip Value:
Similar to the previous use ofskip, this determines how many nails to skip from the starting nail. It helps avoid drawing visually insignificant lines between nearby nails. The value is set to20nails. - String Weight:
In reality, a black thread viewed from a distance is not completely black. To simulate this visually, we define a string weight that determines how much darkness (or pixel value) a single thread contributes to the negative image. This ensures a more realistic and gradual reduction in pixel values. The value is set to20. - Scaling Factor:
To improve visual quality and performance, the algorithm uses a scaled version of the image to draw the output. Working with a smaller (scaled-down) version enhances speed while maintaining the visual appearance of the final string art. Here output image is scaled up by a factor of20, providing a higher-resolution result.
Greedy Algorithm To Solve String Art
How the Algorithm Works:
- Starting Point:
The algorithm begins from an initial nail, referred to as the starting nail. - Line Selection Process:
From the starting nail, the algorithm considers lines to all other nails. For each possible line, a score is calculated to determine its effectiveness. - Scoring a Line:
The pixel values along the line are summed up using the negative image (where darker pixels represent areas needing more thread coverage).
The total pixel value is divided by the line length, giving a score that reflects the line’s contribution. - Choosing the Best Line:
Out of all lines starting from the current nail, the line with the highest score is selected as the best line. - Updating the Image:
Once the best line is selected, the pixel values of that line are subtracted from the negative image. This update ensures the algorithm focuses on remaining darker areas, gradually improving the string art representation. - Repeating the Process:
The algorithm moves to the end nail of the best line and repeats the process.
It continues drawing lines, scoring, and updating the image iteratively. - Stopping Condition:
The process stops once the maximum line count is reached.
Here is the Python code to calculate the score of a line based on pixel values in the image.
import numpy as np

def calculate_line_score(error_image: np.ndarray, line_coordinates: list[tuple[int, int]]) -> float:
    """
    Calculate the score of a line based on pixel values in the given error image.

    The score is computed as the average pixel value along the line.

    Args:
        error_image (np.ndarray): A 2D numpy array representing the error image (grayscale).
        line_coordinates (list[tuple[int, int]]): A list of (x, y) coordinates representing the line.

    Returns:
        float: The average pixel value along the line.
    """
    pixel_values = [error_image[y][x] for x, y in line_coordinates]
    return np.mean(pixel_values)
We need a utility function to perform element-wise subtraction of two matrices while ensuring the result stays within the range [0, 255]. Here’s the implementation for that.
import numpy as np

def subtract_matrix(error: np.ndarray, line_mask: np.ndarray) -> np.ndarray:
    """
    Subtracts two matrices element-wise, ensuring values remain within the valid range [0, 255].

    The function converts both input matrices to `int32` to avoid underflow during subtraction.
    It then clips the result to the range [0, 255] and returns the final matrix as `uint8`.

    Args:
        error (np.ndarray): The first input matrix.
        line_mask (np.ndarray): The second input matrix to subtract from the first.

    Returns:
        np.ndarray: A matrix resulting from the subtraction, clipped to the range [0, 255]
                    and converted to `uint8` type.
    """
    result = np.clip(error.astype(np.int32) - line_mask.astype(np.int32), 0, 255)
    return result.astype(np.uint8)
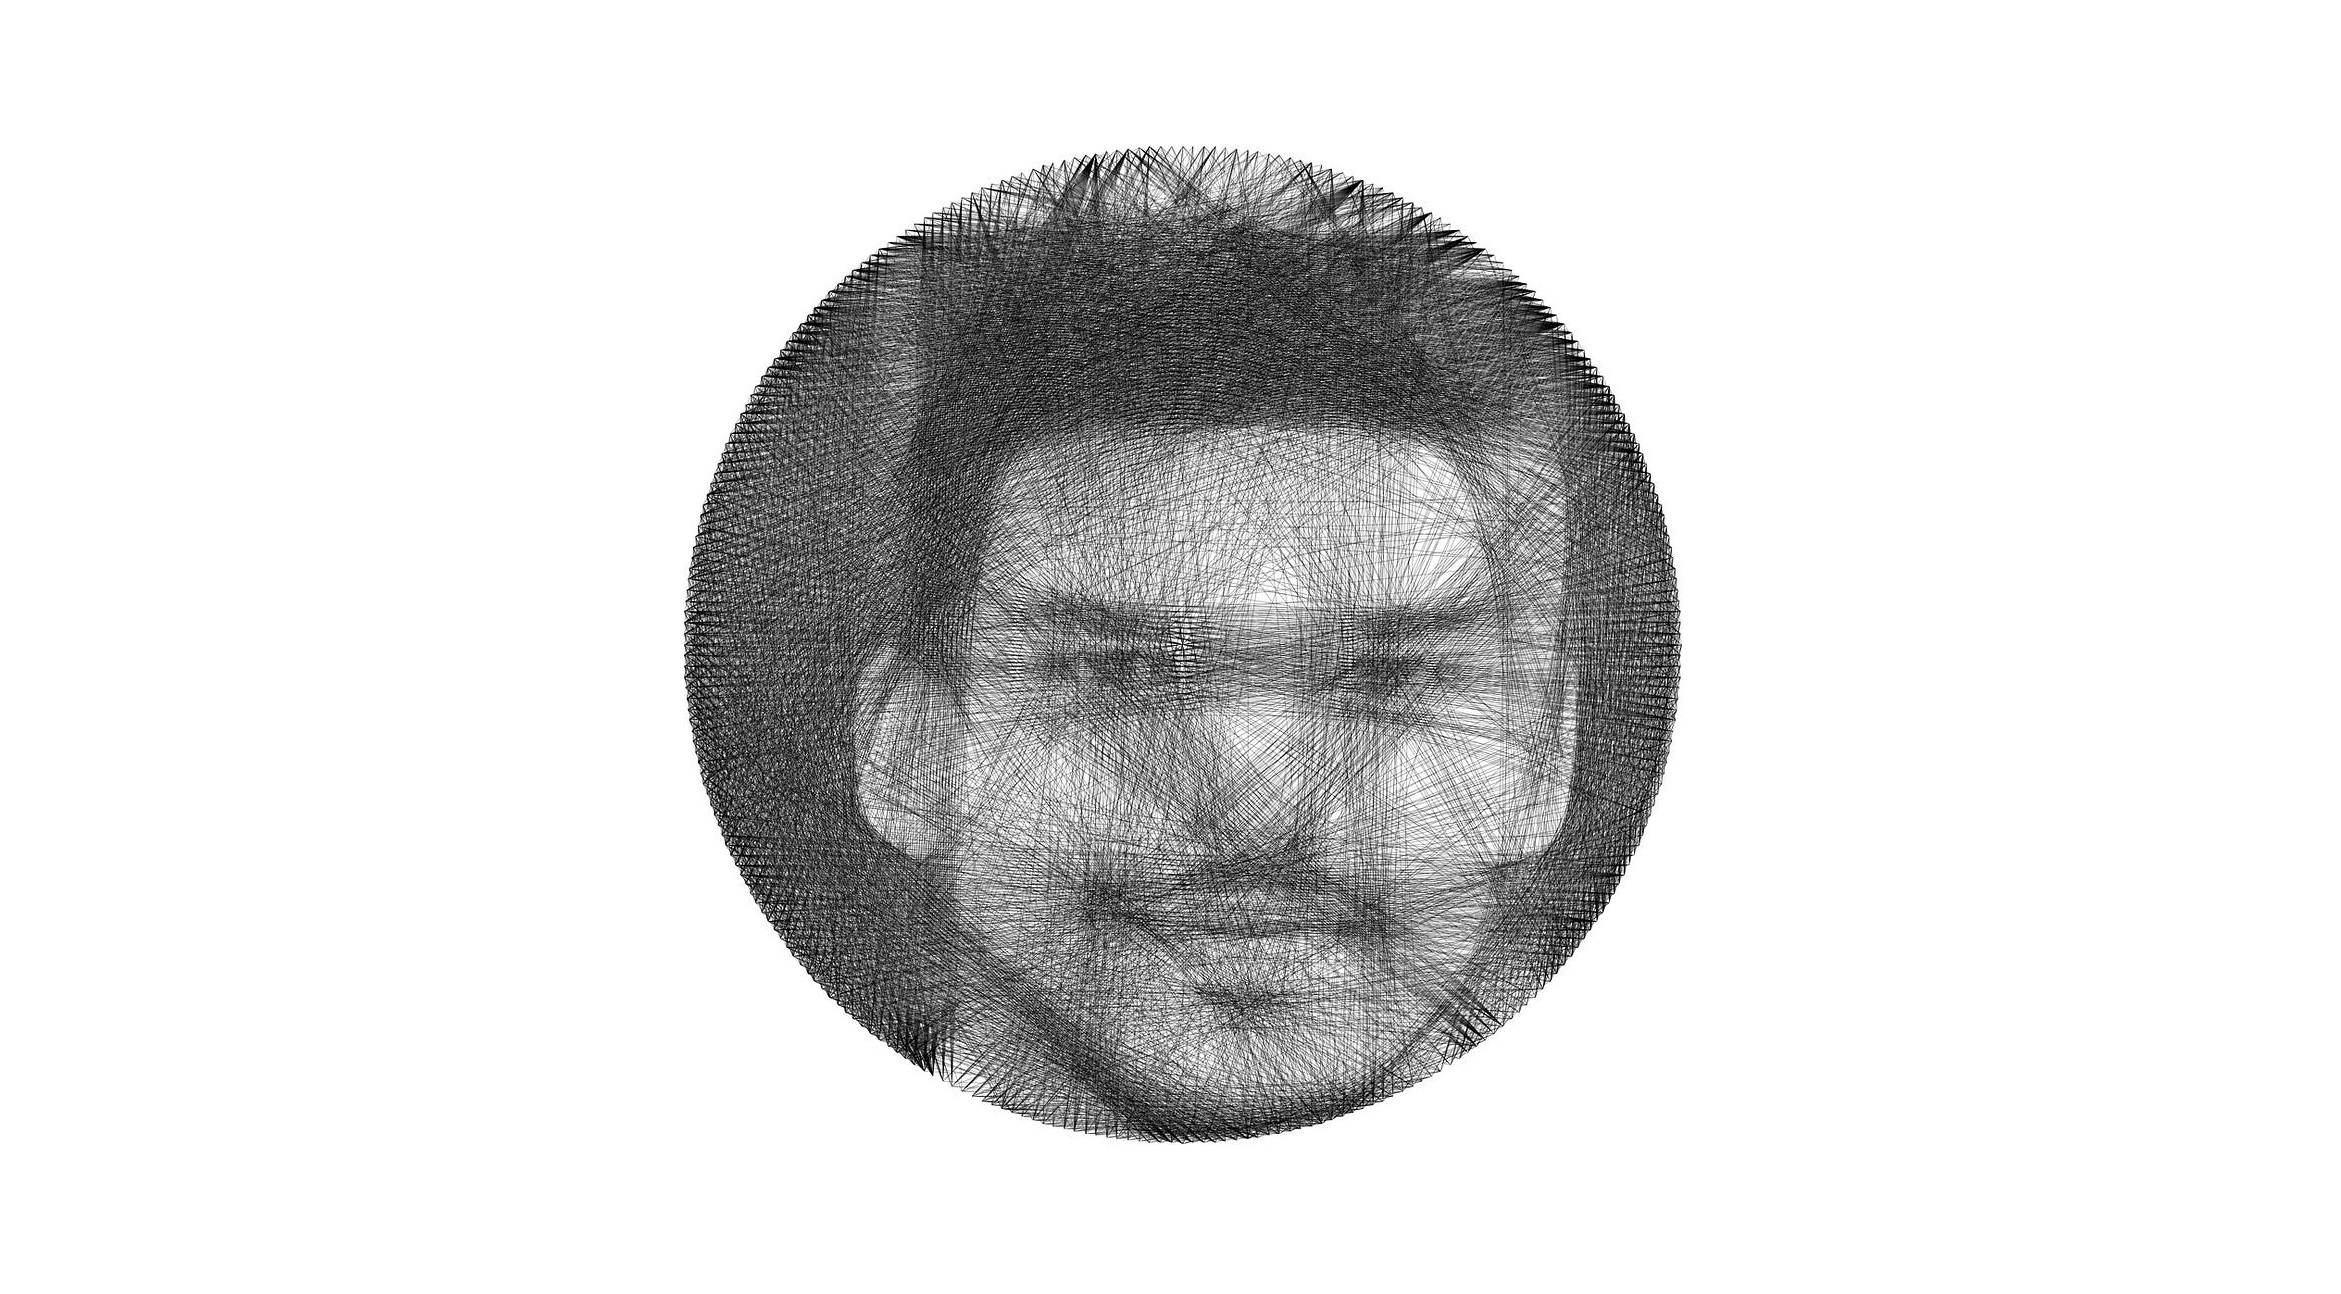
We’ve finally reached the heart of the process where the real magic happens. This is the algorithm that solves the puzzle using a greedy approach, step by step, to create a stunning piece of art. Starting with a portrait image, it cleverly draws one line at a time, selecting the best possible line at each step. The result? A mesmerizing artwork made entirely of lines that come together to form a beautiful image. Isn’t that amazing?
import numpy as np
import cv2
from utils import calculate_line_score, subtract_matrix


def generate_string_art(
        line_combinations: dict[str, list[tuple[int, int]]],
        base_image: np.ndarray,
        max_lines: int,
        nail_positions: list[tuple[int, int]],
        scale_factor: int,
        thread_weight: float
) -> np.ndarray:
    """
    Generates a string art representation of an image using a greedy algorithm.

    The algorithm iteratively selects the best line (from precomputed options)
    based on pixel intensity scores from a negative image. It minimizes the
    error matrix while visually constructing the string art.

    Args:
        line_combinations (dict[str, list[tuple[int, int]]]): Precomputed line pixel coordinates.
            Keys are strings formatted as "start_nail_end_nail", and values are lists of (x, y) points.
        base_image (np.ndarray): Grayscale input image (negative format is used for processing).
        max_lines (int): The maximum number of lines (threads) to draw.
        nail_positions (list[tuple[int, int]]): List of (x, y) positions for all nails on the canvas.
        scale_factor (int): Scale factor for upscaling the output image.
        thread_weight (float): Intensity reduction per thread, simulating the "darkness" of a thread.

    Returns:
        np.ndarray: Scaled final image of the generated string art.
    """
    # Constants
    SKIP_NEARBY_NAILS = 20  # Avoid short lines
    RECENT_NAIL_LIMIT = 30  # Limit for recently visited nails
    LINE_THICKNESS = 2  # Thickness of the thread lines

    # Image dimensions and initialization
    img_height, img_width = base_image.shape[:2]
    total_nails = len(nail_positions)
    empty_canvas = np.full((img_height, img_width), 255, dtype=np.uint8)  # Blank white canvas
    negative_image = empty_canvas - base_image  # Initial error matrix
    scaled_canvas = np.full((img_height * scale_factor, img_width * scale_factor), 255, dtype=np.uint8)

    # Variables for tracking progress
    recent_nails = []  # Recently visited nails
    nail_sequence = []  # Sequence of drawn nails
    drawn_lines = set()  # To track already drawn lines
    current_nail = 0  # Start nail
    iteration_count = 0  # Line counter

    nail_sequence.append(current_nail)

    while iteration_count < max_lines:
        best_score = -1
        best_target_nail = -1

        # Search for the best possible line to draw
        for offset in range(SKIP_NEARBY_NAILS, total_nails - SKIP_NEARBY_NAILS):
            target_nail = (current_nail + offset) % total_nails
            line_key = f"{current_nail}_{target_nail}"

            # Skip redundant lines or recently used nails
            if target_nail in recent_nails or line_key in drawn_lines:
                continue

            # Score the line based on its contribution to reducing the error matrix
            line_coordinates = line_combinations[line_key]
            score = calculate_line_score(negative_image, line_coordinates)

            if score > best_score:
                best_score = score
                best_target_nail = target_nail

        # Break if no valid target nail is found
        if best_target_nail == -1:
            break

        # Update the error matrix
        best_line_key = f"{current_nail}_{best_target_nail}"
        line_coordinates = line_combinations[best_line_key]
        line_mask = np.zeros((img_height, img_width), dtype=np.float64)

        for x, y in line_coordinates:
            line_mask[y, x] = thread_weight

        negative_image = subtract_matrix(negative_image, line_mask)

        # Draw the line on the upscaled canvas
        start_point = (
            nail_positions[current_nail][0] * scale_factor,
            nail_positions[current_nail][1] * scale_factor
        )
        end_point = (
            nail_positions[best_target_nail][0] * scale_factor,
            nail_positions[best_target_nail][1] * scale_factor
        )
        cv2.line(scaled_canvas, start_point, end_point, (0, 0, 0), LINE_THICKNESS, cv2.LINE_AA)

        # Update tracking structures
        drawn_lines.update({best_line_key, f"{best_target_nail}_{current_nail}"})
        recent_nails.append(best_target_nail)
        if len(recent_nails) > RECENT_NAIL_LIMIT:
            recent_nails.pop(0)

        current_nail = best_target_nail
        nail_sequence.append(current_nail)
        iteration_count += 1

        # Display progress
        cv2.imshow('Negative Image', negative_image)
        cv2.imshow('String Art Progress',
                   cv2.resize(scaled_canvas, (img_width, img_height), interpolation=cv2.INTER_AREA))
        cv2.waitKey(1)

        print(f'\rDrawing Line {iteration_count}/{max_lines}', end='', flush=True)

    print("\nString Art generation complete!")
    return scaled_canvas
Finally, here is the main Python script to execute and generate the string art result:
This script uses the greedy algorithm to iteratively draw lines between nails, creating a string art representation of a portrait. You can run it with the provided parameters to see the final artwork.
Make sure you have all dependencies installed (such as OpenCV) and the necessary utility functions for the script to work as intended.
import numpy as np

from greedy_algorithm import generate_string_art
from utils import get_image_in_grayscale, get_nails_coordinates, get_all_possible_line_combinations

def generate_portrait_string_art(image_path: str, num_of_nails: int, radius: int, center: int,
                                 max_iterations: int, output_scaling_factor: int, string_weight: int) -> np.ndarray:
    """
    Generates a string art portrait from a grayscale image using the greedy algorithm.

    This function loads the specified image, calculates the nail coordinates,
    generates all possible line combinations between nails, and then applies
    the greedy algorithm to iteratively draw the best lines that approximate
    the image in a string art style.

    Args:
        image_path (str): The file path of the input image.
        num_of_nails (int): The number of nails to use in the string art.
        radius (int): The radius of the circular arrangement of nails.
        center (int): The center point of the nail arrangement.
        max_iterations (int): The maximum number of lines to draw.
        output_scaling_factor (int): The scaling factor for the output image to enhance visual quality.
        string_weight (int): The pixel intensity reduction per thread, simulating thread darkness.

    Returns:
        np.ndarray: The generated string art image (scaled) as a NumPy array.
    """

    # Step 1: Load the grayscale image
    grayscale_img = get_image_in_grayscale(image_path)

    # Step 2: Generate nail coordinates based on the number of nails and radius
    nail_coordinates = get_nails_coordinates(num_of_nails, center, radius)

    # Step 3: Get all possible line combinations between nails
    line_combinations = get_all_possible_line_combinations(nail_coordinates)

    # Step 4: Generate the string art using the greedy algorithm
    scaled_output = generate_string_art(
        line_combinations,
        grayscale_img,
        max_iterations,
        nail_coordinates,
        output_scaling_factor,
        string_weight
    )

    return scaled_output

# Example usage:
if __name__ == "__main__":
    image_path = "./resources/taton-moise-zWQ7zsBr5WU-unsplash.jpg"
    num_of_nails = 250
    radius = 249
    center = 250
    max_iterations = 4000
    output_scaling_factor = 20
    string_weight = 20

    # Generate the string art
    string_art_image = generate_portrait_string_art(
        image_path, num_of_nails, radius, center, max_iterations, output_scaling_factor, string_weight
    )

    # Display the result (optional)
    import cv2
    cv2.imshow("String Art Portrait", string_art_image)
    cv2.waitKey(0)
    cv2.destroyAllWindows()
References
If you’re keen on exploring string art further, here are some valuable resources that you might find helpful:
- http://artof01.com/vrellis/works/knit.html
- https://www.reddit.com/r/DIY/comments/au0ilz/made_a_string_art_portrait_out_of_a_continuous_2/
- http://datagenetics.com/blog/december12019/index.html
- https://erikdemaine.org/fonts/stringart/?text=Sandaruwan&font1500=1
- https://github.com/halfmonty/StringArtGenerator
These resources not only deepen your understanding but also provide practical tools and inspiration for creating your own stunning string portraits. Whether you’re an artist or a tech enthusiast like me, there’s something truly magical about watching strands of thread transform into intricate patterns and images